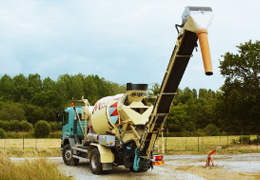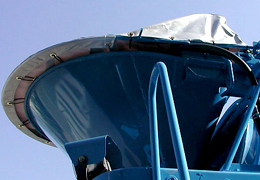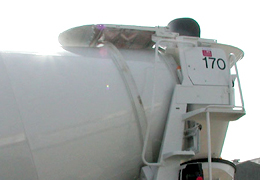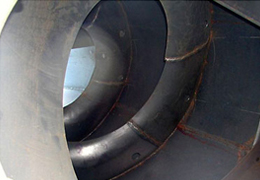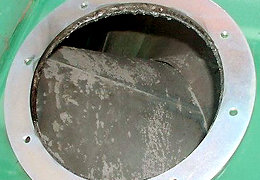
An inspection hatch to allow efficient work inside the drum of a concrete mixer truck.
![]()
![]()
![]()
![]()
![]()
![]()

![]()

![]()

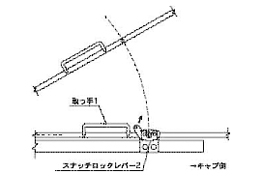
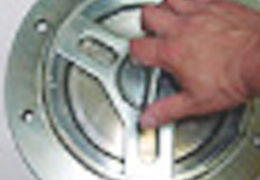
When the boss stops, pull the handle out from that position, then turn the slide plate as far as the notches in the frame to the left, while pressing the whole plate in with the palm of your hand.
![]()

Hold the slide plate and then pull it forward.
![]()
![]()
Hold the slide plate, and align it with the position of the notch in the frame, then push the seal plate in to attach it.
![]()
Once the seal plate fits into the frame, turn the whole slide plate to the right while pushing it in.
![]()
Insert the pin of the handle into the boss hole, and turn it to the right to thoroughly fasten it.
![]()
![]()
Use the tip of the handle grip, a coin, or a straight screwdriver etc. to remove the plug in the center of the seal plate.
![]()
While pushing the whole of the slide plate in with the palm of your hand, turn the slide plate to the left so that the three ends of the slide plate align with the three notches in the frame.
![]()
Insert the pin of the handle into the boss hole, and turn it to the right. Once the slide plate stands out forward from the frame, turn it either right or left until the slide plate comes into contact with the front of the frame.
![]()
In the same conditions as step 3, turn the handle in the reverse direction (to the left) until the seal plate starts to turn together with the boss. When that happens, use one hand to hold down one end of the slide plate.
![]()
When the seal plate starts to turn, grip the slide plate and pull it out.
![]()
![]()

Once you have decided the attachment position, use a baby sander to remove the paint from the area which touches the inner circumference of the weld flange.
![]()
![]()

Place the weld flange over the drum shell, and turn it, looking for an orientation that produces a good fit. *Note 1
![]()
![]()
To weld the weld flange without distorting it, temporarily weld the flange at 8 or more points around the inner circumference, in the sequence left-right, top-bottom.
![]()
![]()

Weld the entire inner circumference of the weld flange.
![]()
Use a gas cutter etc. to cut away the drum shell from the inner circumference of the flange, taking care to avoid cutting off the welded face. *Note 2
![]()
The drum flange will be hot after cutting. Use water etc. to cool it. After cutting is complete, water entering the clearance between the connection flange and the drum shell can cause corrosion, so caulk the entire periphery.
![]()

Use a baby sander etc. to smooth the cut face. *Note 3
![]()
Mounting the body Place the mounting packing against the surface and fasten the bolts. *Note 4
![]()
* Note 1) Relocation method
On drums made by KYB Corporation, the mounting for the operation levers is fastened by bolts, and there are holes for relocation next to those bolts, so relocate to those holes. (If it still does not work, fabricate stays or other parts to allow mounting. The clearance value is at least 15mm). On drums made by ShinMaywa Industries, the mounting for the operation levers is welded in place, so use a gas cutter etc. to cut the welded area, then move the operation levers to a position where they will not come into contact with the Peepers equipment. Secure the cut part by welding.
* Note 2)
When using gas cutting, cut only along the inside of the flange and along a hole diameter sufficient to enable mounting the body. This will produce a hole of appropriate diameter to allow body mounting.
* Note 3)
It is sufficient if Peepers is placed against the weld flange and the holes in its mounting flange align with those in the weld flange at all eight locations.
* Note 4)
Orient it so that the pins are at the top when operated. In most cases, operation is performed above the fender on the right side, so the pins should be on top when you stand on the right fender with the Peepers in front of you.